UNREAL FIRST PERSON SHOOTER TUTORIAL (Unreal 5.1.1)
Introduction
Welcome to the exciting world of game development! If you're looking to make your very own first-person shooter (FPS) game, then you're in the right place. In this blog, I'll be sharing my experience with the Unreal First Person Shooter Tutorial and my thoughts on creating my first FPS game.
As a beginner in game development, I decided to try out the Unreal Engine because of its user-friendly interface and the vast range of tutorials available online. One of the most popular tutorials on the engine is the First Person Shooter Tutorial, which guides you through the process of creating a fully functional FPS game.
The tutorial covers all the necessary basics, from setting up your project, creating levels, and importing assets to programming player movement, creating weapons, and adding enemies. The tutorial is presented in a step-by-step manner, making it easy for beginners to follow along.
The first step was setting up the project, which involved creating a new project with the FPS template. Once the project was created, the tutorial took me through the process of creating the first-person camera, player movement, and jump functionality. The tutorial also included creating a HUD (heads-up display) to display important game information like health, ammo, and score.
The tutorial then guided me through creating a level for the game, adding environment assets like walls, floors, and ceilings, and placing static and dynamic lights to create a realistic environment. Next, I learned how to import assets like weapons, enemies, and sound effects into the game.
The tutorial covered programming the weapons, including adding animations, creating shooting mechanics, and reloading functionality. It also taught me how to create enemies with AI (artificial intelligence), so they can shoot back and move around the level. I learned how to program the enemies to follow the player, use cover, and attack the player when in range.
Once the tutorial was complete, I had a fully functional FPS game that I could play and test. It was an exciting feeling to see the game come to life and work exactly how I wanted it to. The game was not perfect, and I encountered a few issues along the way, but I was able to solve them by following the tutorial's instructions and searching for solutions online.
In conclusion, the Unreal First Person Shooter Tutorial is an excellent resource for beginners looking to create their first FPS game. It covers all the necessary basics and provides a step-by-step guide that is easy to follow. The tutorial helped me gain a better understanding of game development, and I am now eager to explore more advanced game development techniques. If you're interested in game development, I highly recommend giving the tutorial a try!
My outcome:
This is the tutorial I followed but below is the breakdown of the tutorial to explain certain functions more.
Sure, here's a list of the sections covered in the Unreal First-Person Shooter Tutorial:
1. Setting up Your Project
2. Creating the First-Person Camera
3. Creating Player Movement
4. Creating Jump Functionality
5. Creating a HUD
6. Creating a Level
7. Adding Environment Assets
8. Placing Static and Dynamic Lights
9. Importing Assets
10. Programming the Weapon
11. Creating Shooting Mechanics
12. Adding Animation to the Weapon
13. Adding Reload Functionality
14. Creating Enemies
15. Programming Enemy AI
16. Programming Enemy Movement
17. Adding Combat Functionality
18. Creating a Main Menu
19. Adding Audio
20. Testing Your Game
Each section provides step-by-step instructions on how to create different aspects of a fully functional FPS game using Unreal Engine.
setting up the project
Setting up your project
Setting up your project is the first step in creating a first-person shooter game using the Unreal Engine. The project setup process is straightforward, and the Unreal Engine provides a variety of templates that you can use to get started quickly. In the Unreal First-Person Shooter Tutorial, the FPS template is used.
To set up your project, you need to follow these steps:
1. Open the Unreal Engine Editor.
2. Click on "New Project" on the start-up screen.
3. Select the "First-Person Shooter" template from the "Blueprint" tab.
4. Choose a project name and location, then click "Create Project."
The engine will then create your project and open it in the editor. You will see a basic FPS level with a character and a gun.
The FPS template provides a basic framework for creating an FPS game, including player movement, first-person camera, and basic shooting mechanics. You can use this template as a starting point and modify it as needed to suit your game's specific needs.
Once your project is set up, you can begin customizing your game by creating new levels, importing assets, programming new mechanics, and adding new features. The Unreal Engine provides a vast range of tools and resources to help you create a unique and immersive FPS game that stands out from the crowd.
Overall, setting up your project is a critical first step in creating a successful FPS game. The Unreal First Person Shooter Tutorial provides step-by-step instructions on how to set up your project and get started with creating your first FPS game.
Implementing the player character
implementing player charecter
Implementing the player character is a crucial step in creating a first-person shooter game using the Unreal Engine. The player character is the primary point of view for the player, and it is responsible for handling user input, controlling the camera, and managing game state.
In the Unreal First Person Shooter Tutorial, implementing the player character is done by creating a Blueprint class that inherits from the ACharacter class, which is provided by the engine. The ACharacter class provides built-in functionality for handling player input, camera movement, and character movement.
To implement your character, you need to follow these steps:
1. Create a new Blueprint class that inherits from the ACharacter class.
2. Add a camera component to the Blueprint and set it up as the default first-person camera.
3. Set up the character's mesh and animations.
4. Implement character movement using the built-in movement functions provided by the ACharacter class.
5. Set up input bindings for movement and shooting.
Once your character is implemented, you can test it by playing the game and moving around the level. You should be able to move your character, jump, and aim the camera around the environment.
It is important to note that the Unreal Engine provides a vast range of customization options for implementing your character. You can create custom animations, add new movement mechanics, and program new gameplay features to make your character unique and interesting.
In conclusion, implementing your character is an essential step in creating a successful FPS game using the Unreal Engine. The Unreal First Person Shooter Tutorial provides step-by-step instructions on how to create and implement your character, and it is an excellent resource for beginners looking to get started with game development.
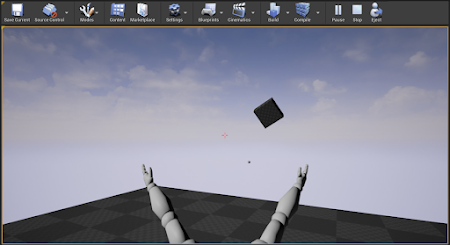
Implementing projectiles
Implementing Projcetiles
Implementing projectiles is an important aspect of creating a first-person shooter game using the Unreal Engine. Projectiles are used to simulate firing weapons and provide the player with a means to engage with enemies and interact with the game environment.
In the Unreal First-Person Shooter Tutorial, projectiles are implemented using a combination of Blueprint scripting and C++ code. The engine provides built-in functionality for handling projectile physics and collision detection, making it easy to create realistic and interactive projectiles.
To implement projectiles, you need to follow these steps:
1. Create a new Blueprint class that inherits from the Actor class.
2. Add a static mesh component to the Blueprint and set it up as the projectile mesh.
3. Add a projectile movement component to the Blueprint and set it up to simulate projectile physics.
4. Set up collision detection for the projectile using the built-in collision functions provided by the engine.
5. Implement shooting mechanics in the player character Blueprint, including spawning and firing the projectile.
Once projectiles are implemented, you can test them by playing the game and firing your weapon. You should see the projectile travel through the environment, interact with objects and enemies, and cause damage.
It is important to note that the Unreal Engine provides a vast range of customization options for implementing projectiles. You can create custom projectile meshes, adjust the projectile physics parameters, and program new projectile behaviors to make your game unique and interesting.
In conclusion, implementing projectiles is a critical aspect of creating a successful FPS game using the Unreal Engine. The Unreal First-Person Shooter Tutorial provides step-by-step instructions on how to create and implement projectiles, and it is an excellent resource for beginners looking to get started with game development.


Comments
Post a Comment